.NET Analyzer’s Introduction
With the introduction of .NET 5.0, Microsoft has packaged Roslyn Code Analyzers within the .NET SDK. Their main purpose is to simplify the logic, check for syntax errors, and provide code quality improvements. All our projects will use these analyzers and when used in combination with the standards imposed at GreatIdeaz, will provide cleaner and more concise code.
Before continuing, please ensure you’re using Visual Studio version 16.8 or newer. Otherwise, you will not be using the latest .NET SDK which includes the .NET Analyzers.
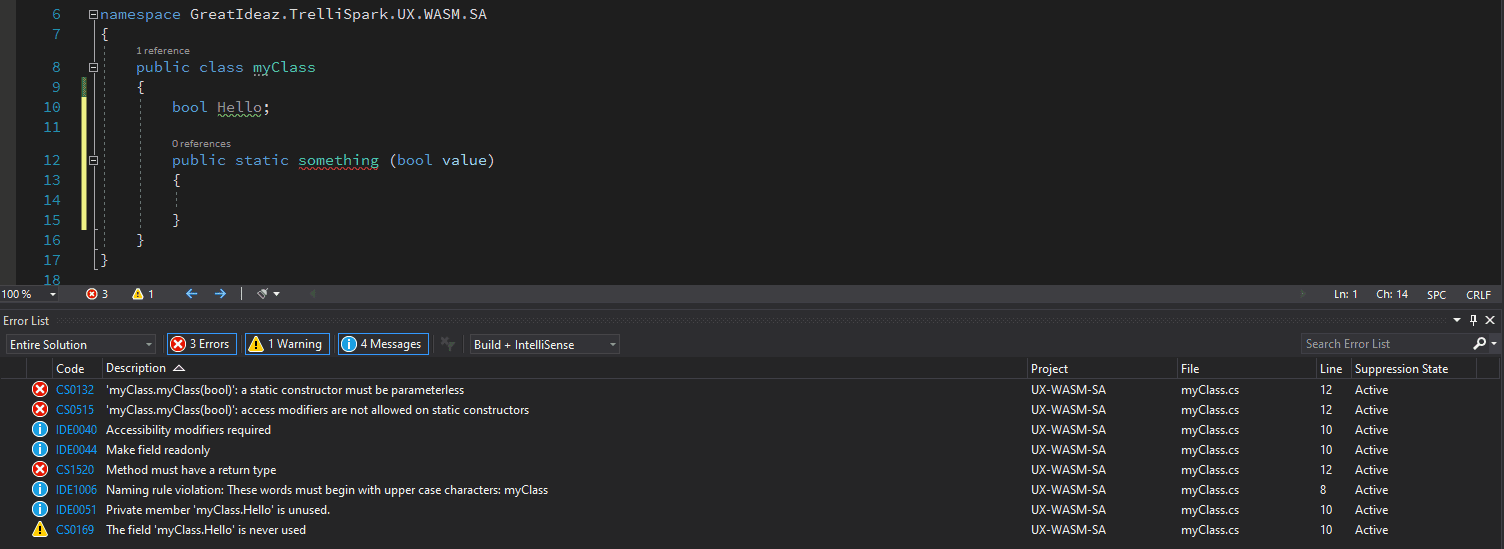
If your code violates any of our standards handled by the analyzers, Visual Studio will provide a notification by producing a build error, warning, or message based on its severity. Visual Studio will also underline the code that’s been flagged in the text editor region with a red/green underline or grey dots (Refer to the image below for a visual example of all three).
It’s expected that all three categories have zero notifications when you submit code for review or push your code.
Please be aware that currently the analyzers are not reliable with flagging errors within razor files. If you come across a flagged item that you disagree with, call a meeting with the team to discuss the error, upon the team’s approval the error can be added the suppression list. This list can be found inside the editorconfig file that every project has. If a change is intended to take affect across all projects, the editorconfig file in each project needs to be updated as the editorconfig file is scoped to the project it’s within.
Enabling .NET analyzers
By default, all new projects that target .NET 5.0 (or later) will have the .NET analyzers enabled by default.
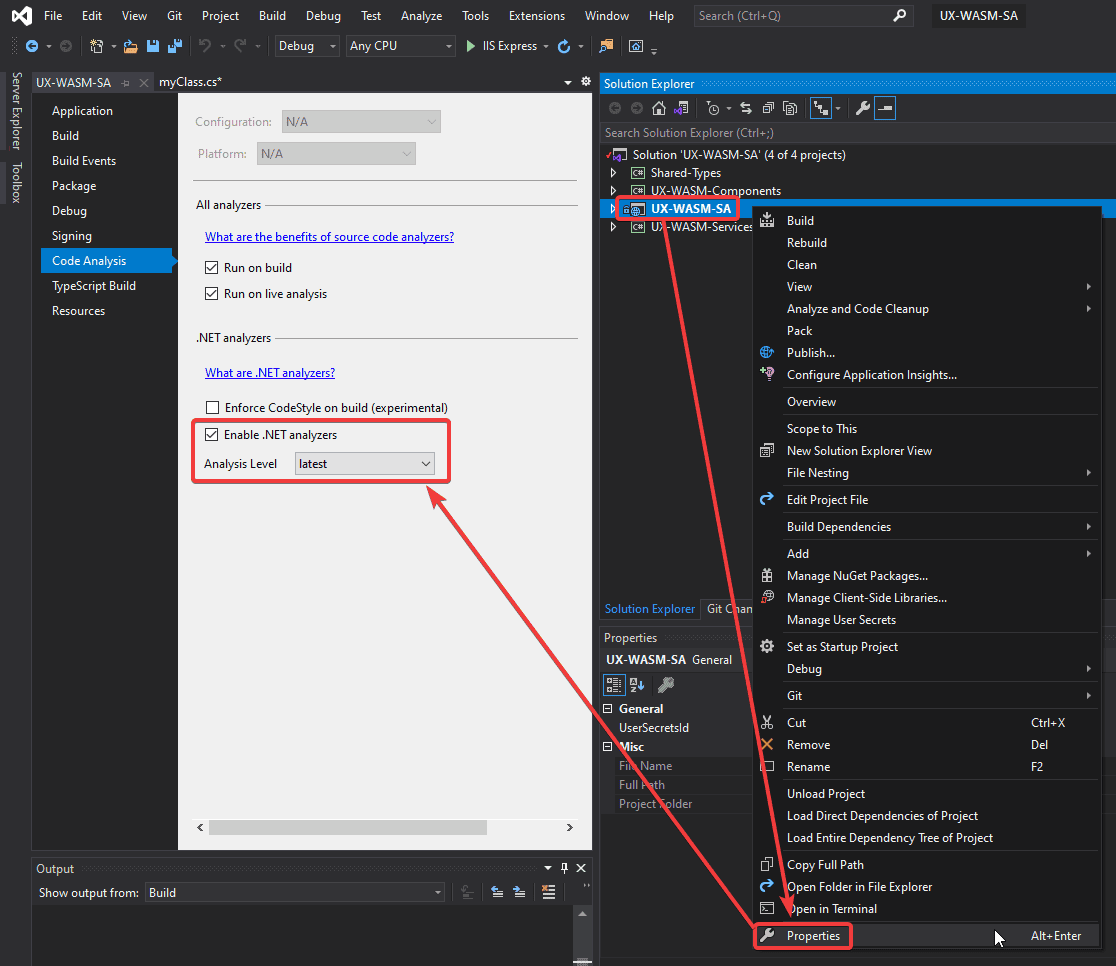
To ensure .NET analyzers are active on .NET5 or newer projects navigate to the solution explorer and right click on a project and select properties.
A project properties window will open. In the left-hand navigation select Code Analysis and ensure the Enable .NET analyzers checkbox is checked and the Analysis Level is set to Latest. If you had to make some changes make sure to save (CTRL+S).
To enable .NET Analyzers in legacy projects (.NET 4 or older) it’s a slightly different process.
To enable .NET Analyzers on legacy projects, those projects must reference a .NET SDK. Here is an updated list of available SDKs a project can reference. This point will be touched on below and shown where to add a reference if one is not already present.
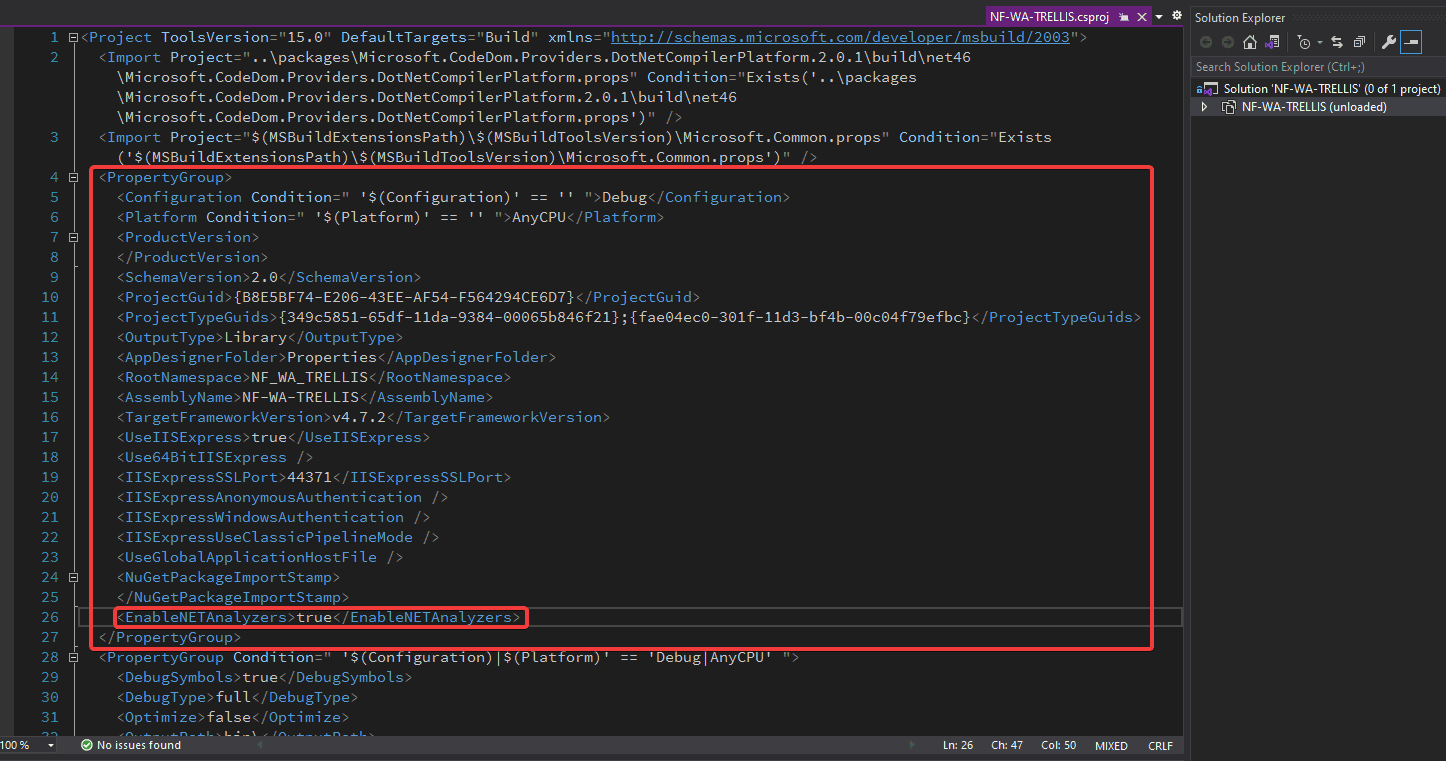
Simply right click on the legacy project and click unload project.

Once you’ve unloaded the project you can now modify the project file XML. Within the <PropertyGroup> region add the following on a new line and save: <EnableNETAnalyzers>true</EnableNETAnalyzers>
If your project does not currently reference a project SDK <EnableNETAnalyzers> will have no effect. To reference a project SDK simply select the SDK that relates to your project from this list and add it to the <Project> tag.
![]()
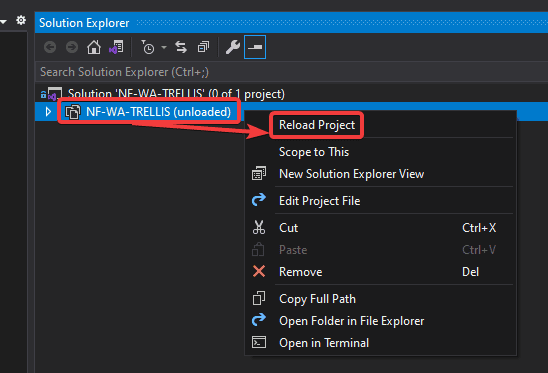
Once you’ve finished editing the project XML file and saved it, right click on the project in the solution explorer window and select reload project.
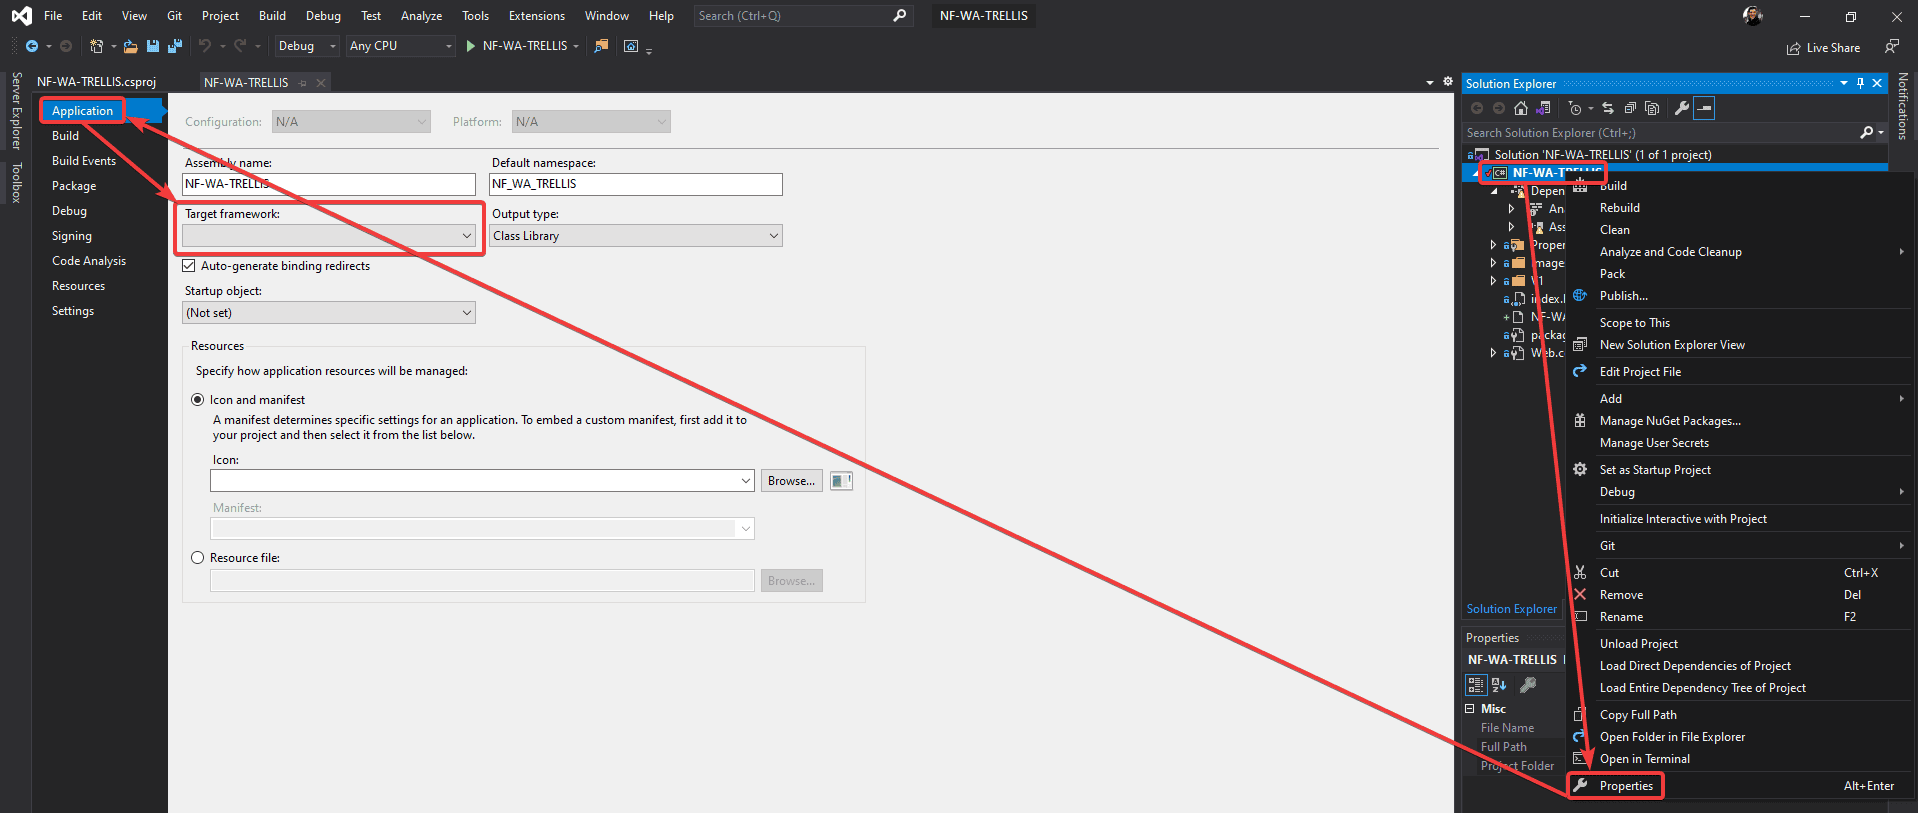
If your project was previously not referencing an SDK then you might have some compile errors regarding duplicate references. These vary per project; you’ll have to remove the duplicate references in question. You will also need to reassign your Target Framework to what it originally was, this can be done by right clicking the project and clicking properties. Then In the left-hand navigation select Application and select your Target Framework from the dropdown list.
Once any potential duplicate references are resolved perform a clean and rebuild and your legacy project will now be using the latest .NET Analyzers.
Manually run analyzers
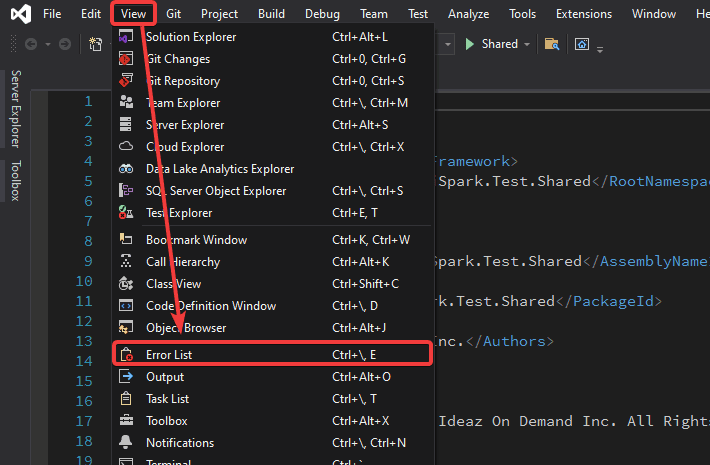
The analyzers will run automatically when a build or rebuild is initiated and when a file is opened. If you’d like to manually run the analyzers, first you need to make sure you have the Error List window open. To open the Error List window, select View > Error List.
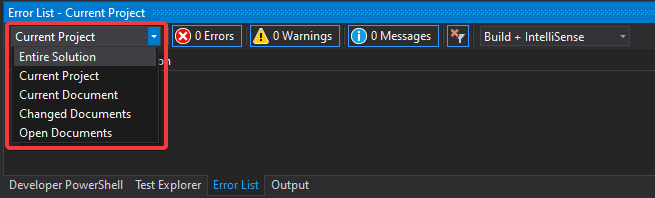
You can then adjust the scope of flagged errors you see in the window by using the dropdown window.
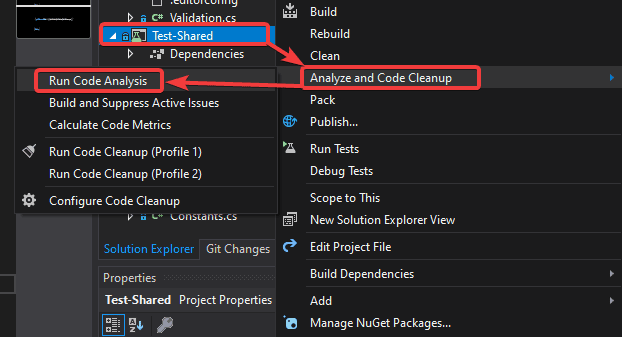
You can manually trigger the analyzers either at the solution or project level by right clicking one either the solution or project.
Solution level
Right-click on the solution and select Analyze and Code Cleanup > Run Code Analysis on Solution. This will scan each project within the solution, all flagged items will appear in the error list.

Project level
Right-click on a project and select Analyze and Code Cleanup > Run Code Analysis. This will scan the specific project, all flagged items will appear in the error list