Roles are used throughout the user experience to restrict a user’s ability to see, modify, or interact with elements of the form.
By default, a user who has access to a form has full permission to save, delete, or modify its underlying record data. You can create user experience permissions at multiple levels to restrict a user’s access based upon the roles you have assigned them.
This capability enables you to provide fine grained control of every aspect of the user experience.
Example Video
An administrator of the workspace can assign zero or more roles to a user using the following steps:
- On the left navigation menu, select the application:
Systems Administration > User Administration
- Select the user from the list


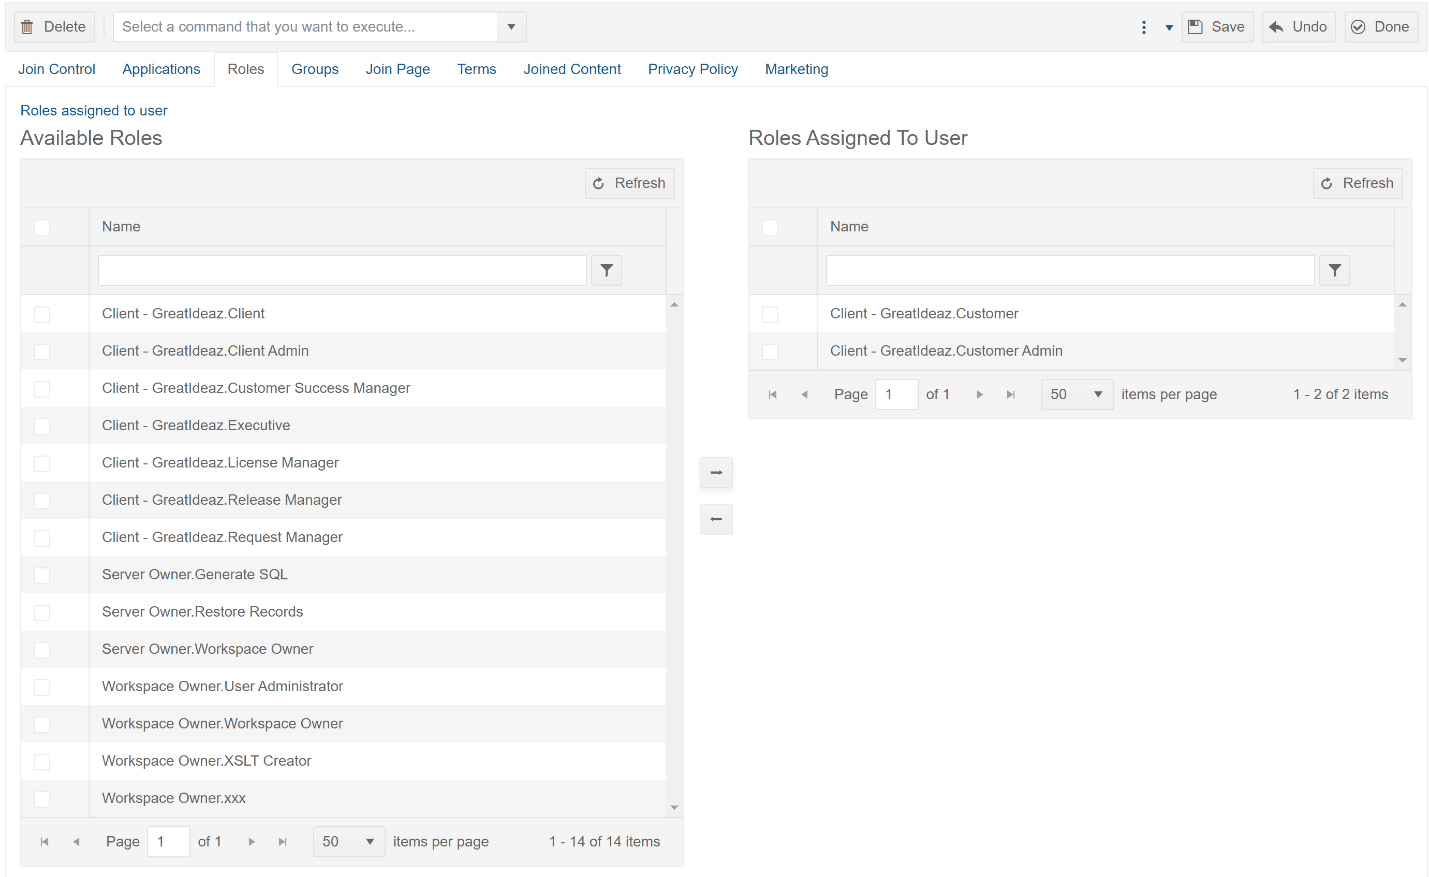
3. Select the Roles tab 
4. Select which roles you want to assign to the user from the Available Roles table on the left side of the screen by selecting the checkbox 
5. Select the right arrow to assign the roles to the user 
To remove a role assigned to a user:
- From the Roles Assigned to User table, select the checkbox next to the role you want to remove

- Select the left arrow ß to remove the role

To make user enrollment easier, an administrator of the workspace can assign zero or more roles to an Invite User using the following steps:
- On the left navigation menu, select the application:
Systems Administration > Invite Users - Select the Invite User record from the list

3. Select the Roles tab

4. Select which roles you want to assign from the Available Roles table on the left side of the screen by selecting the checkbox

5. Select the right arrow to assign the roles
When a new user is added to the workspace using this Invite User link, they will be automatically assigned the roles.
Previous article: Creating your Functionality with the trellispark UX Creator
Next article: Creating Form Definitions using trellispark UX Creator