This article will guide you through creating a wizard from start to finish. The only code needed for wizards is creating TSQL stored procedures to do something with the collected information from the wizard.
Define a new wizard
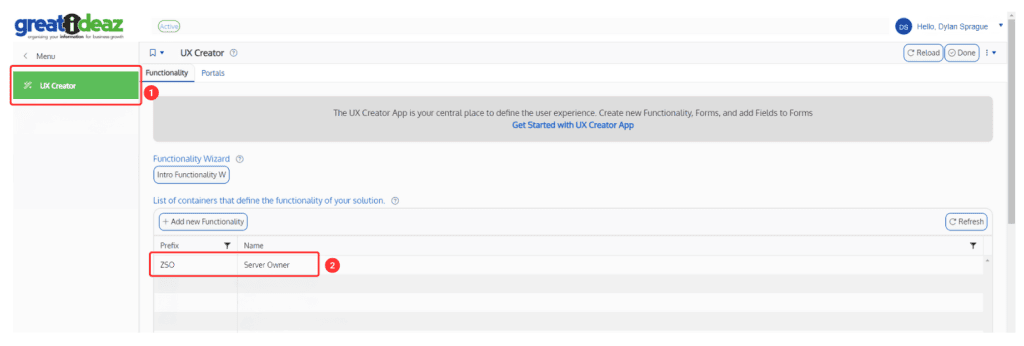
The first step is to decide which functionality to add the wizard. Navigate to the UX Creator app and select the functionality you would like to add a wizard. This guide will use Server Owner as an example.
Once on your desired functionality, select the Forms tab and select the Add new Form Definition button.

Now select Wizard from the Form Type dropdown field, specify the name of your wizard in the Form Name field and select the Save button.

A wizard has now successfully been defined.
The next section will focus on configuring wizards.
Configure wizard
Once you have successfully defined a new wizard you can begin configuring the wizard to your liking.
Adding steps
To add steps to a wizard is the same process as adding tabs to a form. But when the form type is a wizard, tabs are called steps.
Create the first step in your wizard by selecting the Add new Step button available on the Overview tab of the wizard.

The next step is to specify the step order number in the Order field – This will determine the order of the steps. Next, specify a Name – This will be the name of the step that will appear at the top of the wizard, it can be anything you want.
On each step you can also specify targets to be called when the Previous and Next buttons are selected. Populate to Command to be executed on Previous? and Command to be executed on Next? fields respectively to do this.

Once you have created all your wizard steps select the Done button, all the steps you created will be listed in the Tabs childlist. For this example, three steps have been created. The number of steps a wizard can have is up to you, so long as there is a minimum of one step.

Data Model Tab
This is where you can add field definitions to your wizard steps created in the previous step. Creating field definitions is not unique to wizards so the process is the exact same as if you were adding fields to a concept, application, etc.
When configuring field definitions, one thing to note is the the Tab field should be mapped to the Step number you want the field to appear on in the wizard. For Example, if you want the field on Step 1, then the value of the Tab field in the field definition should be 1.
Workflow Tab
The workflow tab includes many fields specific to wizards that you can use to configure different behaviors. Below is a list of the fields and their use:
- Finish Command
- This is an optional target information call that is executed once the wizard is completed if Apply Now is Yes.
- Convert Wizard Data to Concept Form
- Determines what concept the wizard should be converted into once completed, this is an optional field. Use case is if you have a wizard that collects information for a concept type, such as a customer, then once the wizard is complete you create a customer using the data collected from the wizard.
- Apply Now
- This determines if the Finish Command target will be executed and if the wizard data is converted into the selected concept when the wizard is complete or if it should be done at a later point in time. This functionality is for cases when you have Wizards within Wizards and when one of the higher level wizards has this field set to Yes, the Finish Command targets for all children will be executed and the children will be converted to the selected concepts.
- For example, suppose you have a wizard that creates an Invoice and part of that wizard executes another wizard that will create Invoice Lines. If the user completes the Invoice Lines wizard, but cancels the Invoice wizard, then you would have created Invoice Lines for an Invoice that doesn’t exist. In this case you would want to set Apply Now to No on the Invoice Line wizard and Apply Now to Yes on the Invoice wizard, this will not create any Invoice Lines when its wizard is complete, but when the Invoice wizard is complete it will create the Invoice Lines and the Invoice.
- Enable Exit Point
- Determines if the user will be navigated to a different form and will allow you to choose what form they’re navigated to.
- Exit Point Hierarchy
- Only visible when the Enable Exit Point field is Yes.
- Determines what form to navigate the user to in the hierarchy, from the bottom up. Below are examples of possible values:
- 0 will navigate the user to the converted form when the wizard is complete, the Convert Wizard Data to Concept Form field must be specified for this to correctly function.
- 1 will keep the user on the same form they executed the wizard on.
- 2 is the default value and will navigate the user to the parent form of the form they’re currently on. Note that if the parent form is a portal or application, this will not work and you should specify a value in the Exit Point Application/Portal field instead.
- Any value higher than 2 will follow the same pattern. Picking a number that is out of range or is a application or portal will produce errors.
- This field has no use if the Exit Point Application/Portal field is specified.
- Exit Point Application/Portal
- Only visible when the Enable Exit Point field is Yes.
- An optional field that if specified will navigate the user to the selected Application or Portal when the wizard is complete.
- Display success notification when wizard is complete
- Determines if a generic success notification will be displayed when the wizard is complete.
- Display Popup Window after wizard completion
- Determines if a popup window will be displayed when the wizard is finished.
- Popup Window Message
- Only visible when the Display Popup Window after wizard completion field is Yes.
- Contains the content that will be displayed in the popup window when the wizard is complete. If no content is specified then the default message You have successfully completed the wizard! will be displayed in the popup window.
Adding the Wizard to a form
Once you’ve finished configuring your wizard, you need to add it to a form to use it. Follow the steps below to add your wizard to a form:
- Open the functionality the form you want to add the wizard is part of
- Select the Forms tab, and select the Form Definition you want to update
- On the Form Definition, select the Workflow tab, and select the Add new Wizard button
- Select the wizard you configured and configure any additional information to your liking and save
- Finally execute the Clear the form cache command, your wizard is now available on that form